How to Do Curved String Nail Art on Wood
When we work with our students to teach themhow to do string art, nosotros often play with scale. Today I'm going to share two ways we have done string art projects with kids: at a GIANT scale and at a mini calibration. Merely no affair which scale you use this is the perfect STEAM activity combining fine art and geometry with an important maker skill: Hammering.

String art projects give u.s.a. the chance to do something we honey: Showing kids how to safely use real tools and giving them raw materials to work with. It not only fosters independence (a hammer and real nails), it besides hones fine motor skills (pincer grip, tying knots), paw/eye coordination (hammer meets nail), and attentiveness (hammer does not come across finger!)
Though this is a process-based projection, information technology's by far one of my favorite "end" results!
This post contains affiliate links to products.
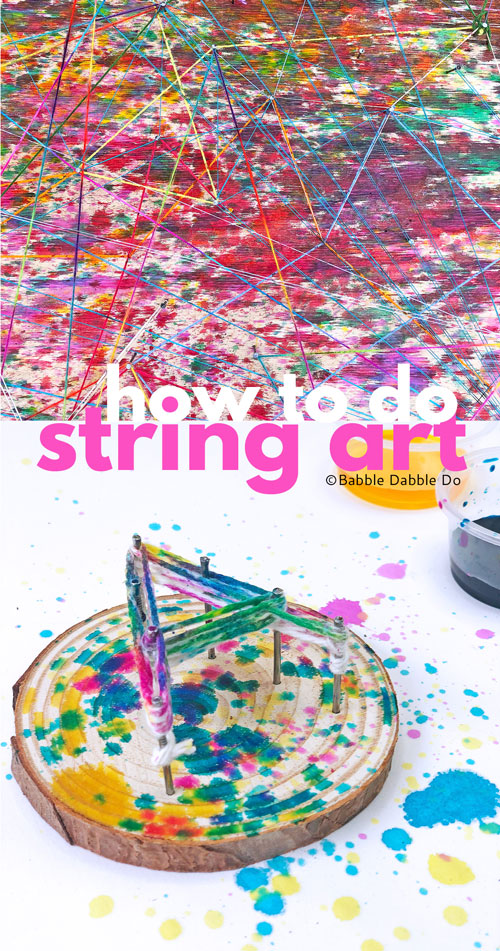
How to Do String Art
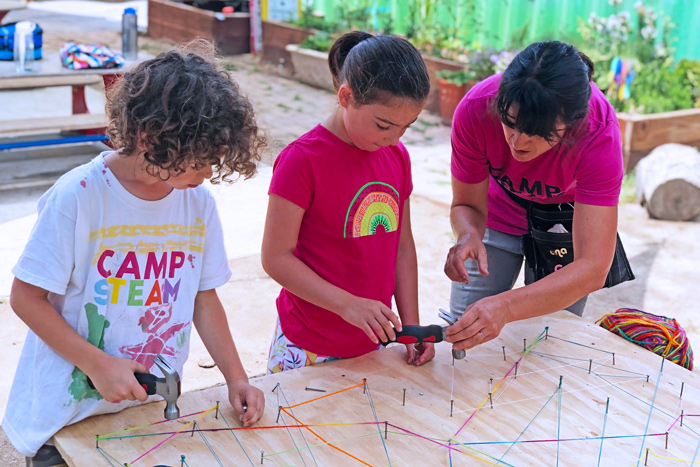
Cord Art Method #1: Go BIG!
At our summer military camp, Camp STEAM LA we Honey to go big. In fact, we are the champions of information technology. An channel? Cheque. Glow in the nighttime sand pendulum? Life-sized geoboards and PLINKO? Yes, yeah, and yes. Case in point: this summer's giant rainbow string fine art. This was i of our Camp STEAM collaborative projects that every camper (and instructor) institute themselves working on at some point during the course of the week.

Materials
- Large piece of plywood (at least 4×4) Tip: Habitation Depot carries half sheets of pre-cut plywood. Do programme ahead to make sure you tin fit the sail in your automobile!
- Pocket-size Hammers I have a few sets of these Chubby Tools
- Nails of various sizes (Common nails work best. Since almost plywood is about ½" thick, yous probably want to wait for 3d & 4d sized nails)
- String or yarn in dissimilar colors. This is my favorite string.
- Pair of scissors
- Liquid watercolor paint
- Bowls
- Paint brushes– toothbrushes for splatter painting
- Pavers, bricks, or books to elevate plywood off work surface
SAFTEY NOTE: Please read our Hammer Safe Section below before working with kids on this project!
Instructions
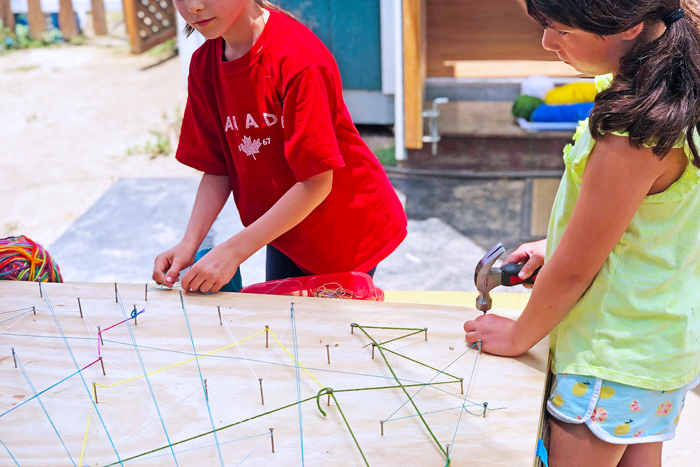
- Pace One Prep your cord art workspace. Cover the area effectually the plywood with a tarp or disposable tablecloths if you programme on painting. The plywood should be attack flat surface. We placed a concrete paver underneath each corner to elevate the plywood off the work surface then that no one hammered a nail into the table (a stack of books would piece of work, also).
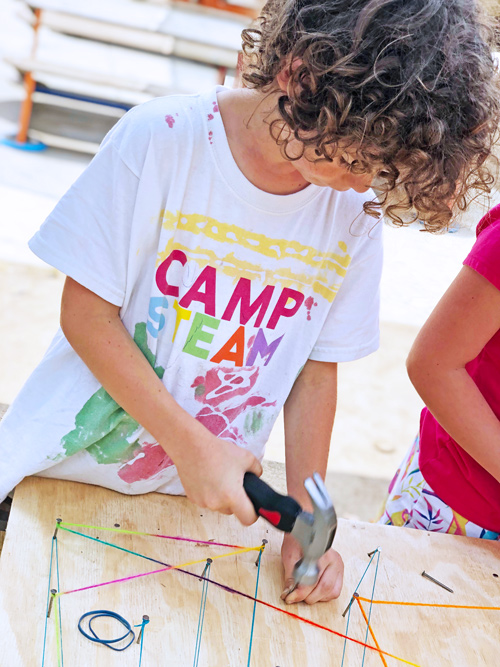
- Step Two Start hammering. Nosotros didn't have a detail pattern in mind, and really tried to cover the board with nails placed in various distances from each other. Alternatively you tin sketch out a grid in accelerate and boom into specific points.
- Stride Three Cut your string. It doesn't have to be set lengths but don't make it too long or it will get tangled. Taking one end of the cord, tie a knot around a nail – this is your ballast point for this item cord. Pull the long end of the string to another nail and wrap it underneath the nailhead – information technology can exist every bit shut to the anchor point as you want information technology to be, but go on in mind that you'll want to wrap this string around the nail head to secure in place. Necktie the other end of the same cord to the nail y'all ended on.
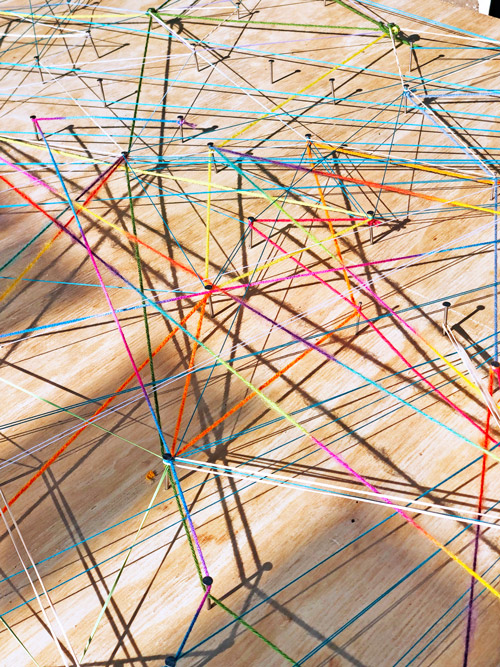
- Step Four Repeat this procedure (necktie – stretch – wrap – stretch – wrap – tie) equally many times as it takes, with as many colors every bit y'all'd like. The strings can be woven under or over i another, besides every bit stretched to reach opposite points.
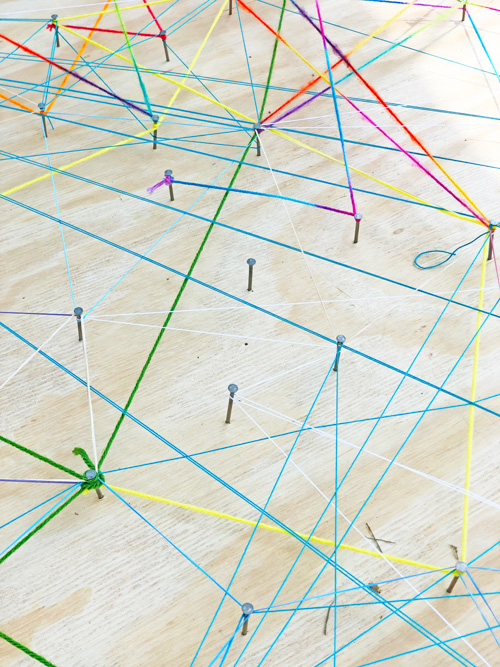
- Step Five (optional) Splatter paint the wood! Fill bowls with watercolor paint – we used cherry xanthous, light-green, and bluish. Dip your brushes in the pigment and find your inner Jackson Pollack.
Variations:
- Try this project with rubber bands or pilus bands and use information technology like a geoboard.
- Sketch a shape on the plywood commencement and hammer in the nails to match the shape.

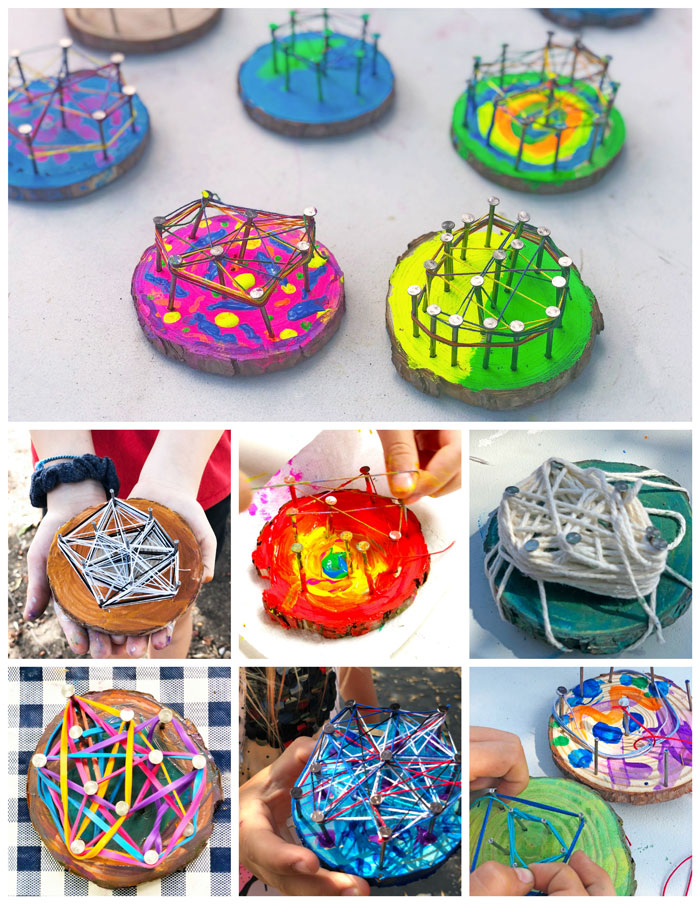
String Art Method #two: Mini
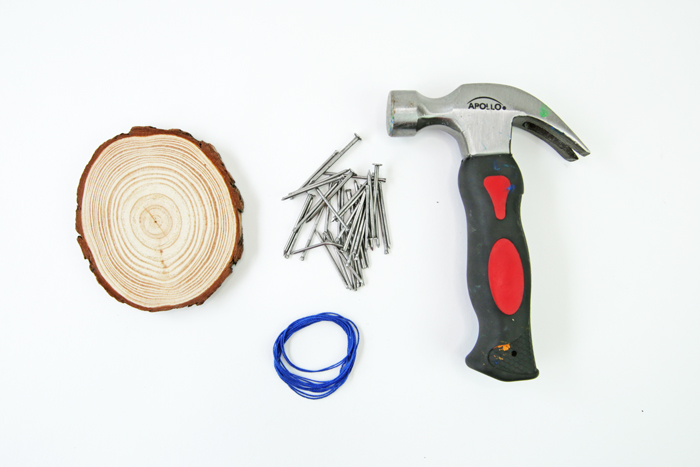
Materials
- Wood Slices
- Small Hammers
- Finish Nails- forest slices are adequately delicate and then smaller nails work best. Big nails can cause the wood to split and scissure.
- String
- Pair of scissors
- Paint
- Paint brushes
Important:Identify a piece bit forest underneath the woods slices to protect the piece of work surface beneath. TRUST ME ON THSI!
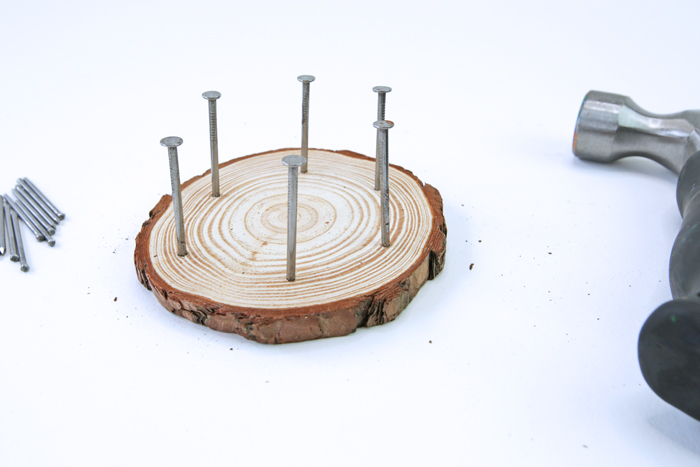
- Pace One Identify your wood slice/scrap wood on a stable surface. Get-go nailing!
- Footstep Two When you are washed nailing, cutting a length of string and tie information technology to one of the nails. Begin wrapping the string around other nails to brand a design. Be sure to wrap each nail head at least once to secure the design in place.
- Step Iii Necktie off the end and trim as necessary,
Variations:
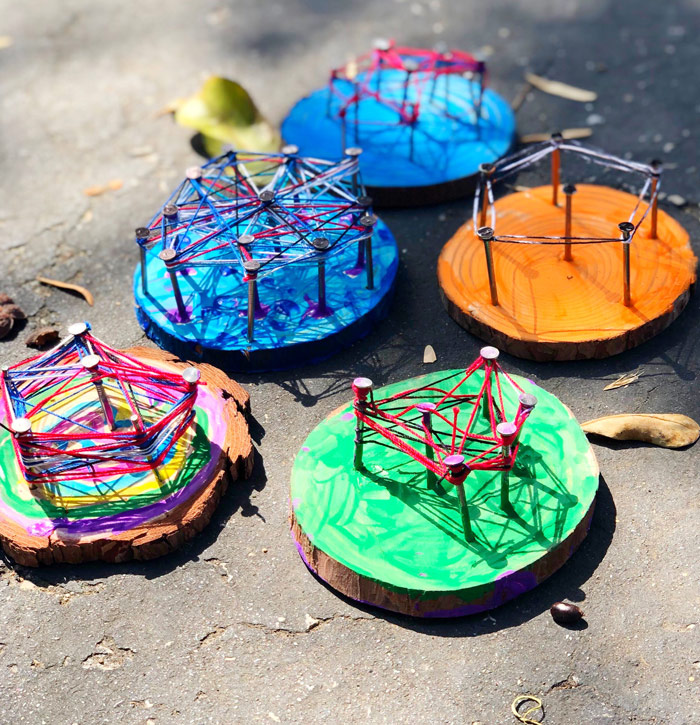
- Pigment the wood slice first using tempera cakes. Then add nails and cord.

- Apply white string/yarn and paint the string afterward you create pattern
- Splatter paint both the cord and wood at the end of the process.

Here is some our our student'due south piece of work:
Let'south Talk STEAM
Engineering
To sympathise how to use a hammer, permit's larn the technology behind how a hammer works:
- Lever A unproblematic machine consisting of a rod positioned on a pivot betoken called a fulcrum. When a forcefulness is practical to the lever it pivots on the fulcrum and performs piece of work.
- Fulcrum The point at which a lever pivots
- Effort The force applied to the lever
- Load The weight beingness moved by the lever
Effort is reduced or increased depending on its position relative to the fulcrum.
In that location are three classes of levers. Hammers are a third course lever in which the attempt is located between the load and fulcrum. The farther the load is from the fulcrum, the endeavor volition be amplified. Therefore if you lot agree the hammer close to the head yous volition become less power nailing than if you concur the hammer at the base of the handle.
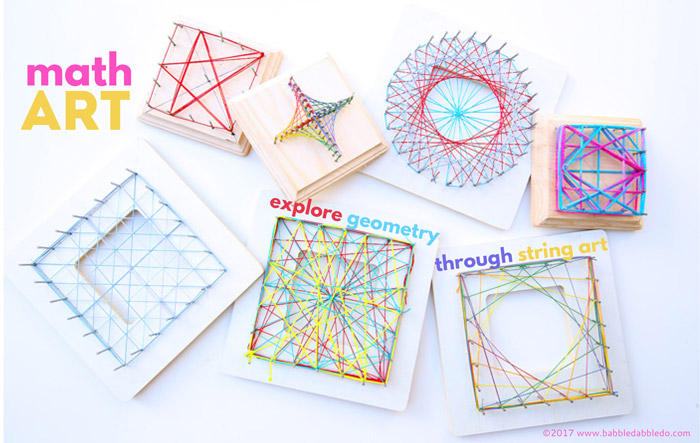
Math
Learning how to practice string art is a tactile way to teach kids almost geometry. String art demonstrates the main concepts of geometry: planes, points, lines, and grids.
- Airplane A flat surface
- Point A position on a plane surface.
- Line The long mark fabricated by connecting two points.
- Grid A ready of horizontal and vertical perpendicular lines makes up a grid.
How does this employ to string art? The forest is the plane, the nails act as points, and the string becomes lines. If you decide to add the nails in a geometric blueprint you may want to create a grid of nails on your wood surface.
Maker Spotlight>> At the end of the 19th century Mary Everest Boole, a mathematics educator in England, discovered that curves could be formed by connecting a series of points with direct lines . She went on to exist the first person to use curve stitching (or "cord geometry") to teach the concepts of angles and space to children. If you'd like to see how you can use string art to talk over curves and geometric shapes hop over here.
Fine art
String art is defined as fine art made with colored thread strung between points to create geometric patterns.
As noted above, Mary Everest Boole used it to teach math to kids, in fact she created sewing cards for this purpose. In the 1960'southward cord art became pop after creative person John Eichinger began creating what he called " string mandalas ." A hobby visitor began mass producing arts and crafts kits based on the work of Eichinger and string fine art found its way into pop civilization.
Today many artists are using string fine art in 3 dimensional installation art. To come across some incredible examples of cord art at a large scale go hither.
Our students' work making mini string art was reminiscent of mandalas since the woods slices are round.
How to (safely) employ a hammer:

Information technology's common to want to hold the hammer near the top, or closer to the head. INSTEAD, concord the hammer near the end to get the most power out of the lever.
- Place Using your all-time pincer grip, hold a nail between your thumb and index finger. Like the hammer, you'll want to grip the nail closest to where it meets the wood.
- Tap Begin hammering by gently tapping ii-3 times until the nail feels steady in the woods.
- Add Force Remove your fingers from the boom, take a peek effectually you to make certain no one is inside swinging distance, and then hit the nail head into the wood using a stronger strength.
Ever make sure y'all wait around you before you begin hammering, and once y'all starting time, always watch where your fingers are. Kids and adults usually learn this the hard manner!
Maker Skills
What is a "Maker Skill?" Maker skills are the hands-on techniques – or skills – that are essential to creating, edifice, designing, and DIYing. Non only are they important in trade and craft, they are likewise fundamental in the development of fine motor skills.
Maker Skills Mastered in this Projection:
√ Hammering
√ Knot tying
√ Scissors
Conclusion
Every time we bring out the hammers our students go veryexcited! I truly believe it'south important to introduce children to real tools and let them the opportunity to larn how to safely use them. Learning how to do cord art gives them this run a risk and the results of this wonderful process are always lovely to brandish no affair what scale y'all choose!
If yous'd like to use string art to go further into teaching kids about geometry hop over here to learn how to use cord fine art to cover geometric shapes:
Are you lot passionate most raising creative kids?
Join over 22,179 parents and educators who want connect with kids and nurture their creative process through magical, easy projects y'all can practise TOGETHER.
Subscribe to our email listing to receive project ideas as well as offers for some our artistic products.
If you want to read our privacy policy before subscribing, hop over here.
rehfischcomplaccese.blogspot.com
Source: https://babbledabbledo.com/how-to-do-string-art-with-kids-scaled-up-and-down/
0 Response to "How to Do Curved String Nail Art on Wood"
Post a Comment